Monday, June 3, 2013

CAD Train Model

    This was my CAD model for the locomotive train. It was a very interesting project and it really tested me in using the software. It was quite difficult and took a while to complete, but it was worth it in the end. It was a very unique activity in that it seemed like a realistic job task and something that I might do in a future career. It was very rewarding once I completed it and it was a great challenge to end this year in Engineering.


The base model/ tutorial I based mine on


Assembly stages with each part

 Final Product


Thursday, May 30, 2013

Capstone Project

1. Empathize: Choose Client:
    For our client we chose Mr. Hoang because we knew he would have an interesting idea for a model home. The only problem we expected was that he might be too ambitious with his design ideas. Also, we knew that he would have high standards like he does for his assignments/projects in his class.

2. Chose a beginner's mindset:
    We wondered how ambitious we could be with the model. We thought of anything we thought would be interesting in a model and discussed them. We thought it would be cool to make a spiral staircase, create a garage, add cars, and maybe even a pool. In the design process, we had to think of any ideas for the brainstorm then narrow it down to make a more practical design.

3. Prepare for the interview:
    We jotted down ideas that we thought Mr. Hoang would be interested in. We knew he was a big fan of video games, basketball, and literature. We knew that he might be interested in a library, basketball court, and other interesting things. We were prepared to ask:

  •  What style house he preferred
  • What color house
  • How many stories  We asked him " What style house youwould like?" and he liked both of the ideas. He really liked the idea of a Skyrim house, but also the modern style. Also, we asked him what features he would want in a house and he said that he would want a basketball court and a library. We asked what type of materials he would like in his house and he said he liked a lot of marble.


4. Empathize: Interview:
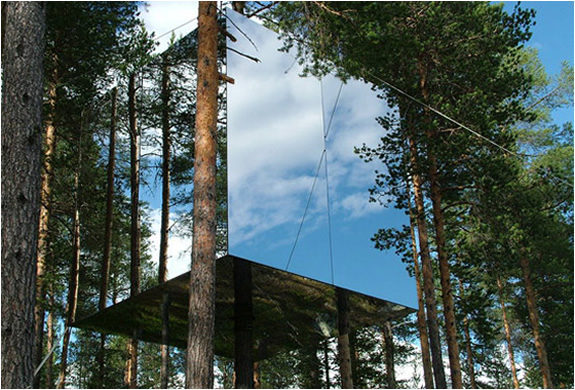
    We interviewed Mr. Hoang about what he wanted in a house. He said that he wanted something modern and having background knowledge that he lived and worked in LA for a while, we looked for modern houses in LA to model ours. Also, he told us that he wanted a really cool interior a lot of which would be hard to create in a model like garage, recording studio, arcade etc.

5. Empathize: Brainstorm Approach:
    We researched many different designs and we wanted something that was as simple as possible. We also knew he was a fan of the Elder Scrolls video game series and we were debating building some sort of castle or building from the dark ages. We liked that idea, but we knew that we had to think logically and practically.


6. Define: Define Goals:
    For the project we wanted to make a modern house that we think Mr. Hoang would like or was fitting for him. We wanted to make sure the boards had clean cuts and were at proper 90 degree angles. We wanted to make windows and doors as well and maybe try to create an interior. Lastly, we wanted it to be a stable and balanced model.


7. Identify: Saturate and Group:
    We took each idea and we expanded on them in separate groups. We tried to expand the ideas to a certain extent so that we could decided which one we would want. We took the medieval/castle idea and began focusing on the details of the house.

  • Peaked roof
  • Wooden looking design
  • Walkway to door
  • Arch ways
  • Library

 Then we took the modern house and started focusing on what elements, exterior and interior, that we should add.

  • Basketball court
  • Garage with cars in it
  • Glass windows/ skylights
  • Pool


8. Identify: Criteria and Constraints:
    We knew that we wanted to create a decent sized model, but we had to make sure that the model would be compact, easy to transport, and easy to store. We had to build a model that we think would match our clients criteria as well as learn a lot about the design process behind it.

9. Ask: How might we:
   We did this activity to help think about the practicality of each design. It helped us sort out the good ideas from the bad ideas which helped us focus in on a certain idea and expand upon our idea. We asked:

  •  "How might we create cars and a pool in a model design?"
  •  "How might we create an interior in a small sized model?"
  •  "How might we scale the model to look proper?"


10. Identify: Selection:
    We decided that we would go with the modern house design for many reasons. One it would take less time, it would be an easier design to execute, it would be hard to make a peaked roof like the ones in Skyrim, and that it would look cleaner to do a modern style home.

11. Identify: Extreme Users
    With our project we wanted something that would be very simple and our's might have been on the extreme side. We should have made some more practicality to the design. How would an everyday homeowner fit in with this house? Any positive aspects or negative aspects? We needed to make something that would be acceptable for anyone, not just Mr. Hoang.

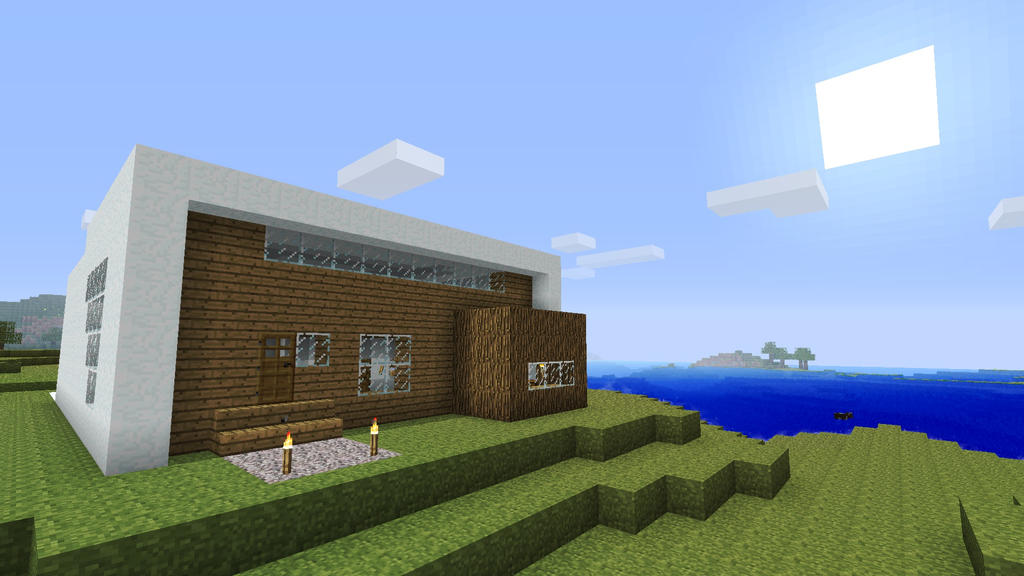
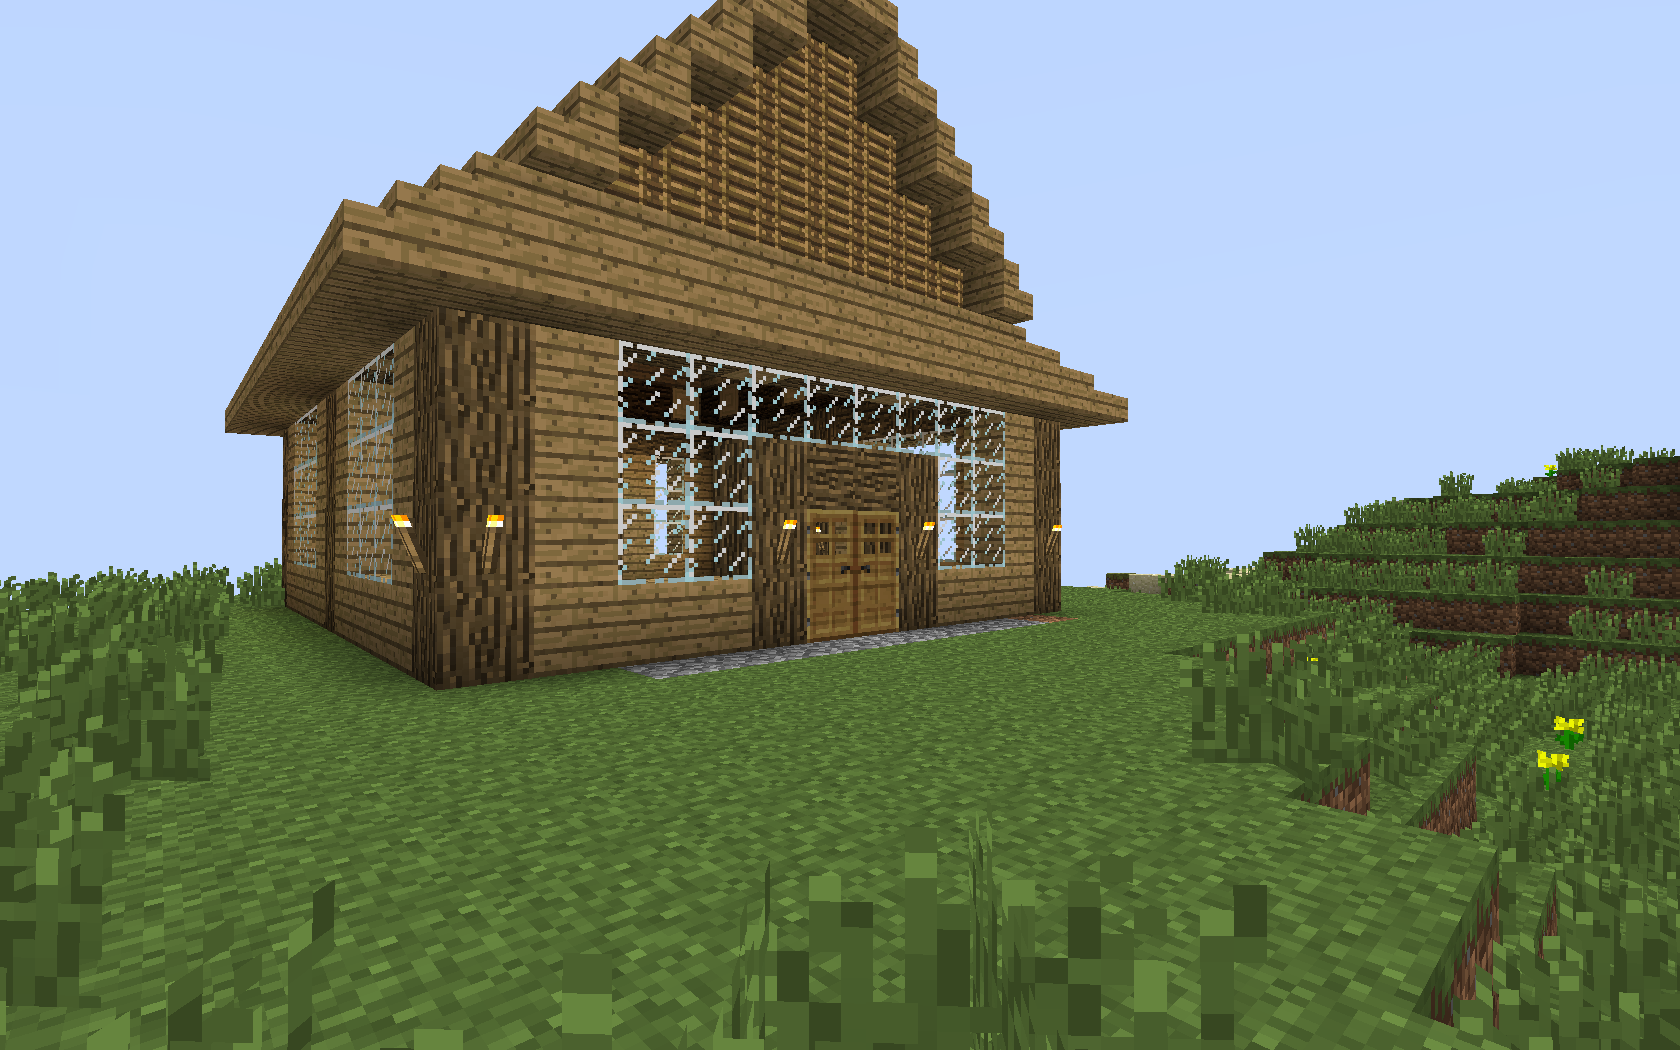
12. Test: Minecraft:
  Through Minecraft we spent a lot of time designing prototypes for our house. We wanted to create a few tests so that we would be more flexible. Our first design was a very modern rectangular home with some glass panels throughout. Our second house was a peaked roof home made out of practically all wood.


13. Test: Minecraft- Positives, Changes, Questions:
    + Very creative and ambitious
    + Very intricate designs
    + Complex interior
 
    ^ Simplify the designs
    ^ Remove windows and doors to get a better visual
 
    ? Are the models scaled to correct size
    ? Are the models too ambitious
    ? How would this be executed using styrofoam

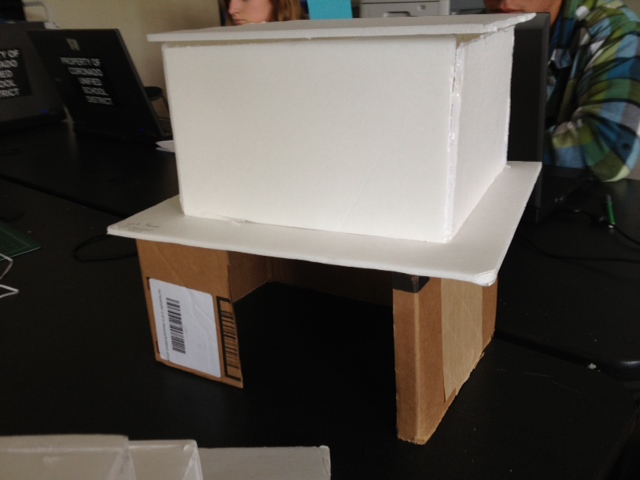
14.Reflect: Final Product:
    Our final project turned out not as good as I would have hoped, but I learned a lot about time management and more about the design process. We could have expanded the interior and added more detail, but with our time constraints we weren't able to. This project helped us practice more hands on execution of models which we hadn't done much of this year.


15. I like, I wish, What if:
   I liked our project's simple design and it's clean appearance. That is one of the goals we accomplished with our project. I wish we could have more time to expand on our idea and help polish it. We could have added more to the interior and been more creative with our model. What if I decided to do a castle which was one of my ideas. It would probably had been a lot harder and we would definitely not make the time deadline.


Tuesday, May 7, 2013

Architecture Model Project

1. The scope is the range of ideas and or work that needs to be done to create a product. Also, it can mean the features that characterize a project.

2. For our project we made the body of the project psychically we created a base, walls and a roof. We wanted to add to the model, but we spent most of our time designing it instead of building it which caused time problems.

3. For the scope of our project we came up short, due to time complications and problems with our idea. For our project we were going to make a big house for Mr. Hoang with a big shingle roof with a wall in front. He wanted a modern house, but wanted an interesting interior.  When we started working on it we weren't able to use those ideas as much.


4. Safety First!:

    1. Tracing a line: First when you cut anything with a box cutter you want to trace a designated line. This helps you know where you are cutting and ensures that you are cutting in a straight line first.
    2. Using a ruler: When using a box cutter you usually want to use a ruler to ensure that you have clean cuts that are very straight and clean. To ensure that the cut is clean you want to do several moderate/light cuts instead of trying to get the job done with one rigid swipe. 

     3. Without a ruler: Sometimes you don't need a ruler when cutting less important things. It can be a little bit more dangerous though because the razor isn't being guided by a straight edge. This should only be used for cutting up boxes for recycling or on projects that don't require one.

5. Client Feedback:
    + Had clean cuts on the pieces of Styrofoam.
    + Looked clean and didn't have leftover scraps still on it
    + Simple is better

    ^ Could use a paint job to make it more interesting
    ^ Expand upon the base design (garage, fence, more stories)
    ^ Add doors, windows, interior items

6. Instructor Feedback: We created a model home, but it definitely could have been expanded and have more work put into it. The project had clean cuts, but the overall design could have been more polished and made more extensive.

7. Student Feedback: We got two best in show sticky notes for having a simple design that some students enjoyed. We didn't get as many as we could have gotten, but we will try to do better on the next project we do.


Monday, April 15, 2013

2013 Egg Drop

This year we were tasked with the project of making a enclosure to keep an egg from cracking when dropped off a one-story balcony. We decided to make a container if an inner core and and outer core separated by bubble wrap.The inner core was a peanut butter jar that was emptied out and filled with bubble wrap and secured it with tape. Then we got a milk carton and cut an opening out of the top. We filled the milk carton with another layer of bubble wrap. Then we put the egg in the peanut butter jar and put that inside of the milk carton and taped the top closed. We were unsure if we wanted to add a parachute, but after testing it many times we were able to use the milk carton without it.

1.Create a sketch of one possible solution


2. Create a sketch of another possible solution

3. Create a sketch of a third possible solution

4. Generate a list of materials required for build day


5. Document a plan to ensure materials are brought in on block day.

6. Your materials fit inside a printer paper box

7. Your materials fit inside a shoe box


Our design weighed 180g! We earned the following weight achievements:

8. Your materials weigh less than 500 grams.

9. Your materials weigh less than 300 grams.

10. Your materials weigh less than 200 grams.


Since we decided against the parachute, our design was very accurate. We scored a bullseye! This earned us the following accuracy achievements:

11.You hit the butcher paper!

12. You hit inside the third ring!


13. You hit inside the second ring!

14. You hit inside the first ring!

15. You hit the Bullseye!


Our egg didn't break in any way so we score five achievements for resilience!:

16. Your egg didn't break in any way!

17. Your egg didn't break in any way!(Dropped our egg twice)

18. " "

19. " "

20. " "


21. Help set up the Bullseye.

22. Design an Achievement Mr. Olson approves for next year's Egg Drop Challenge. A Hard Landing- Make an enclosure without the use of a parachute

- We chose this a Achievement because we want to incentivize competitor focus on designing a very secure and safe interior of their enclosure. This is a risk reward because it could make your egg more prone to cracking, but it will make it more accurate and will earn an extra achievement.


23. Describe an aspect of the event using arithmetic.

24. Describe an aspect of the event using geometry.

25. Describe an aspect of the event using algebra.

26. Describe an aspect of the event using calculus.

27. Seek out additional instruction from your math teacher in support of a Calculation Achievement.

Monday, February 25, 2013

Tuesday, February 12, 2013

Tree Hotel

I was browsing on the internet when I stumbled upon this really unique hotel in Sweden. The hotel rooms are designed as tree houses and are around 1-2 rooms in each. We converted the price and it's about $600 for 2 people to stay in one of the rooms. I wonder who the architect was who built these because they're really fascinating. treehotel


Tuesday, February 5, 2013

Superbowl Advertisement

My favorite was the Doritos commercial with the goat. I thought it was memorable because it was really unexpected when the goat was screaming and the fact that it was a fan made commercial. In the Superbowl a 30 second ad costs $3.5 million. It was cool because they used a contest to find the best commercial and had people vote for their favorite to be aired. For a typical commercial they would have to pay actors, production crew, set locations, catering and an advertising company. Though, it was probably very cheap comparatively, but they paid the group that did the commercial $1,000,000 for winning the contest. In total the cost was probably about $4.5 million to produce the commercial.Assuming each bag of Doritos costs about $3, Doritos would have to sell around 1,500,000 widgets(bags of chips) to make back the money spent. I think it will help sell bags of Doritos, but not directly. I feel that they will sell a ton of bags either way.